Saturday, May 22, 2010

A Window with a View

If you recall from my garden wish list, I have been hoping for something to spruce up the very bare part of our house that we see from the patio.
I am happy to report that this wish has come true in the form of my Mothers' Day gift-- window boxes! It has taken a few weeks for R to install them, but today I finally prettied them up.
The nursery was overwhelming, so I immediately latched onto the first employee who could tolerate me.  She was kind enough to show me all the options available to someone with my sort of light exposure (full sun until afternoon).  Being the kind of person I am (no plan at all) I put plants into my cart, put more plants into my cart, took out the plants that didn't look right, got more plants, took out more plants, and so on. My enthusiastic nursery staff person put up with that for a little while and then said, "I'll leave you do your decision-making." I settled on ivy, trailing verbena, geranium, vinca, and magilla perilla (why do I want to call it 'gorilla'??). 

Wednesday, May 19, 2010

Peach Trees

The view from our kitchen window just got three times prettier with the addition of three small peach trees behind the fence and blueberry bushes.
R planted them this weekend and hopes to add three apple trees to the 'orchard' later this week.  The small trees have little fuzzy peaches on them, but we are not expecting much of a harvest this year.  Either the shock of being planted or the local deer population will minimize our first summer of peaches.  Once the trees get tall enough to outreach the deer, though, we are hoping to be able to start adding peach pies, preserves, and wine to our list of things to do in the late summer.
In this shot you can see the zigzag pattern of how R planted them.

Monday, May 17, 2010

Losing the Lawn, Bit by Bit

My husband hates to mow.  Well, he *says* he hates to mow.  He didn't seem to hate it too much a few years ago when I was inside with a crying baby and he escaped for a few hours of blissful silence (the word 'silence', here, means 'no baby screaming'). Anyway, when it comes to our lawn, the less he has to mow, the better.  So he frequently suggests that I expand the blueberry patch by another three feet, that I mulch all around the vegetable bed perimeter by another few feet, that I expand the herb garden by a few feet on each side... are you starting to form an image in your mind of how garden design works around here?

Anyway, this weekend it was my idea to expand the mulched-not-grassy area, whittling down the amount of mowable lawn by just a dozen or so more square feet.  I had several reasons for this temporary insanity.  First, I must take the wheelbarrow to the mulch pile at least every other day or my neighbors start to think maybe I've gone missing. Second, I have a lot of cleaning indoors that needs to be done and I'd like to avoid that at all costs.  And third, my parents gave me lots and lots of Russian sage Sunday morning, which I needed to plant right away.
 
I spent the hour car ride from their house to mine trying to think of where I'd plant the Russian sage. (Why can't I say no to plant give-aways!?) The only solution was to spend my entire day creating a new area in the garden.
Rather than dig (my least favorite chore in the garden-- I only dug enough to plant the sage) I put landscape cloth down over the grass by our trellis.  This may be cheating, but I love this shortcut.
I mulched all the way out to our crazy fig tree/bush/thing, creating a welcoming entrance through the garden gate.  This took all day and was a lot of hard work.  It may be just me, but hard work often seems more difficult when someone watches you the whole time, occasionally yawning loudly, as Boo is prone to do.  See her here on top of the trellis:

Harvest Shot

I love going outside on a rainy morning and coming inside with something like this.  The pop of a strawberry coming off the stem, the thrill of looking under leaves to find something red and round, the smell of wet dirt...it is a good morning.
This is the first day we've picked strawberries.  Last year, we got a very low yield after weeding out some Creeping Charlie two years ago. The weed wrapped itself around most of our strawberry plants, so to remove it required unearthing each plant.  We also had a drought that summer, so the weeding and replanting and baking in the sun was a bit too much for most of the plants to take. After two years, we're finally starting to get some strawberries back.  The ground ivy is still a problem, but I've promised the strawberries I'd be more vigilant about weeding it before it strangles them.
Oh, and I found a pretty egg when I opened up the chicken coop this morning. (See it nestled in the strawberries, above.)

Friday, May 14, 2010

Jack and the Beanstalk: the Beginning

Surely this is when Jack's story started to get interesting: those beans started to grow!  And this is when our Fairy Tale Garden* starts to get interesting, too.  I didn't have to trade a cow (not that I own one to trade), because most of these beans were given to my by my father, who grows pole beans around his swimming pool.
Our Fairy Tale Garden will hopefully be full of many magical story elements by summer: beanstalks for Jack, orange pumpkins for Cinderella, giant sunflowers for the wondrous effect they create, and purple cabbages to represent that mythical cabbage patch where all children are told they were found (all my children, anyway).
*Our Fairy Tale Garden is different from the Fairy Garden, which is another magical place found here.

Thursday, May 13, 2010

Another Use for Chicken Fabric

Found a great tutorial for a fabric keychain on U create and finally I got around to making my own version.  This is a great way to use a little bit of fabric you *really* like. It is also a great way to find your keys!

Wednesday, May 12, 2010

Happy Day!

This day started off rather dreary outside, but upon closer inspection there was a bit of happiness coming up from the soil.  Look carefully in the picture above and you'll see two butterfly-shaped cabbage leaves sprouting.  I tried growing cabbage last year, with no luck.  I am trying again so that I'll have a nice supply of red cabbage for the chickens all summer.  (I'll eat some, too!)

Saturday, May 8, 2010

Rosemary, O Rosemary...

The tale of our relationship with rosemary is a long and sad one.  It started fifteen years ago when we had a beautiful rosemary plant near the side door of our home in the city.  It was a lovely plant that overwintered well and eventually grew to be a two foot high shrubbery.  Yes.  A shrubbery.
We almost didn't move to our new house because we'd miss the rosemary so much, but more practical reasoning prevailed and we assured ourselves that we could always plant rosemary at our new home.

You know where I'm going with this, don't you?

For ten years we have failed to get a rosemary plant to overwinter outside.  This year we took one small plant inside in a pot and it survived, but barely.  Now that it is spring, we start the experiment again...
Here we see location #1, near the shed. This location faces west, gets afternoon sun and has the benefit of the shed wall to shelter it and a driveway in front of it to radiate heat from a day of sunning.  Of course, planting it right next to the dead remains of last year's experiment should be a clear sign that this location isn't all that great... We garden the hard way around here.
Location #2 faces east and gets morning sun.  The small patio light may or may not have an effect, but the patio stones should collect heat all day in the sun and hold some for the little plant to enjoy.  The bushes behind the rosemary may provide shelter from cold air and wind, but may also hinder growth by blocking some sunlight.  We'll see.  At least no rosemary has ever died here, so we have hope.  No rosemary has ever lived here, either, but people with hope ignore stuff like that.

Location #3 is the favorite to win, mostly because it will come inside this winter.  We planted a new rosemary in the lucky pot.  Our money is on this guy to live all winter.  Especially if we water him.  (We have found that potted plants need lots more attention in this area than the plants in the ground. . . Please don't ask how many potted plants had to die before we figured that out.)
Location #4 has two rosemary plants.  One of the plants is the guy who overwintered inside.  The other is a new guy.  You can see them in this picture in front of a large clump of sage. [From front to back, left to right: thyme, thyme, rosemary from the pot, rosemary, sage, parsley, parsley, wilting gerber daisy]
This location gets full sun until the afternoon, but has no shelter from wind or cold air, and no wall or patio to retain heat.  We don't have a lot of hope for these two plants, but we have failed for ten years, so what do we know??

Thursday, May 6, 2010

More Plant Markers

I was happy to find these inexpensive write-on plant markers at two area gardening stores recently.  They are not large enough for the vegetable rows, but are perfect for the herb garden.  The tops bend back, too, so that no one has to crawl down in the dirt just to read them.

Wednesday, May 5, 2010

Ipod & Phone Case

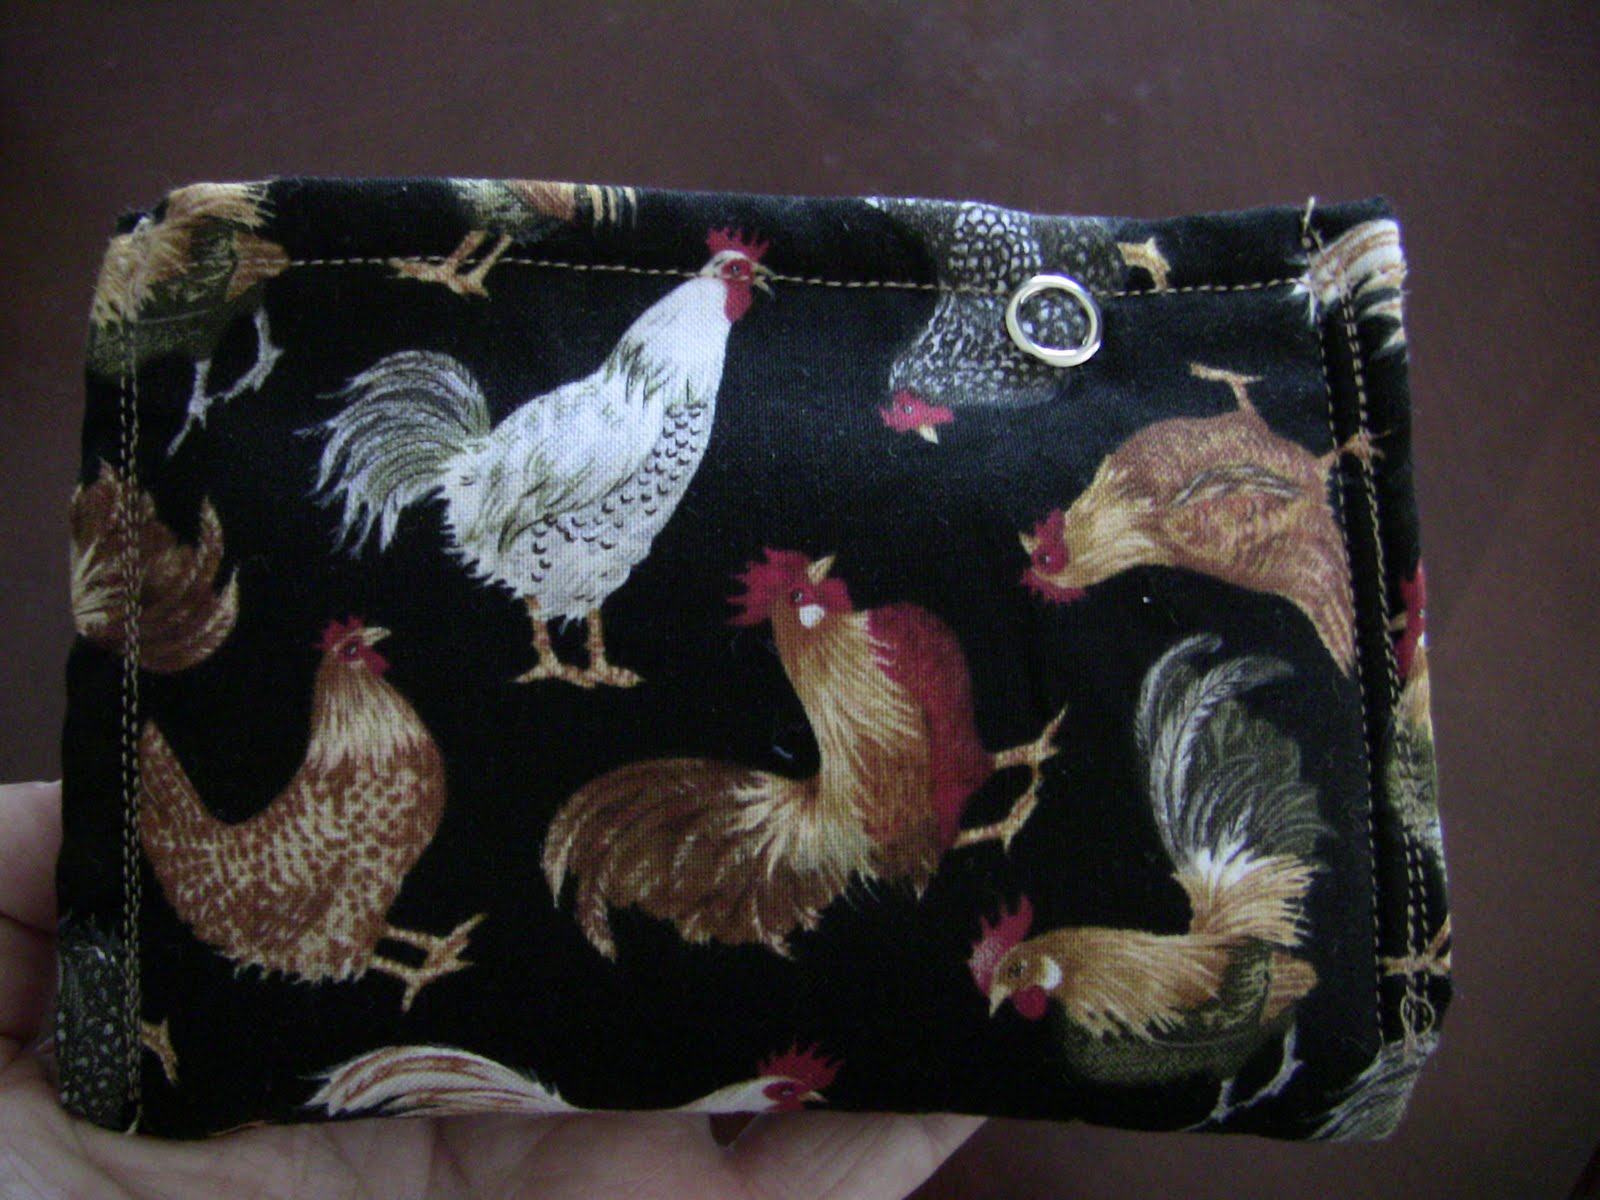
Getting crafty this week!  Or, you could say, getting sick of not being able to find something I could buy that would hold my ipod and phone without scratching it up.  So I found a fabric I would enjoy seeing every day and some felt to match, some ribbon, and a snap fastener kit.
DISCLAIMER: if you know how to sew, how to follow directions for a sewing project, how to do any real crafting, or have left-brained tendencies you may find yourself feeling queasy as you read the following directions. Around here, we just sort of do thing by trial-and-error and hope for the best.
The first thing I did was measure out how much fabric I'd need.  [Yes, I just put the phone and ipod on the fabric and cut around it...  I warned you.  Really left-brained people may want to measure and draw out a plan, but do what works for you.] 
Then I cut ribbon for each side of the case. The ribbons need to be as long as the case fabric, but will be each folded in half. 
 Finally I cut another piece of felt to use as an insert between the ipod and phone, so they won't scratch each other.Felt is great because it does not fray.  The chicken fabric is cotton and does need to be sewn on the edges to keep tiny threads from coming loose.  To do so, I folded under the edge and sewed it to the large felt piece.  You can see they are already sewn together in the photos above.
Just to prove that I do know a *little* about correctly-done sewing projects, the above photo shows that I did iron the folded ribbons and large rectangle.  It is all crooked and crazy-looking, but at least it is flat.
Next, I sewed the felt insert to both sides of one half.  I put the ipod in and it fit. So far, so good!  However, to put both the phone and ipod in the case at this point would make the case too fat to close.  This is why I added the ribbons to the sides, but I tell everyone the real reason is that it looks really good with ribbon on the sides.  See how this works??
Here is where I started wishing I were a bit more left-brained, but I forged ahead bravely.
With the fold of the ribbon where the top of the case will be (shown above at the top of the picture) I sewed a ribbon to each side of the top half of the case.
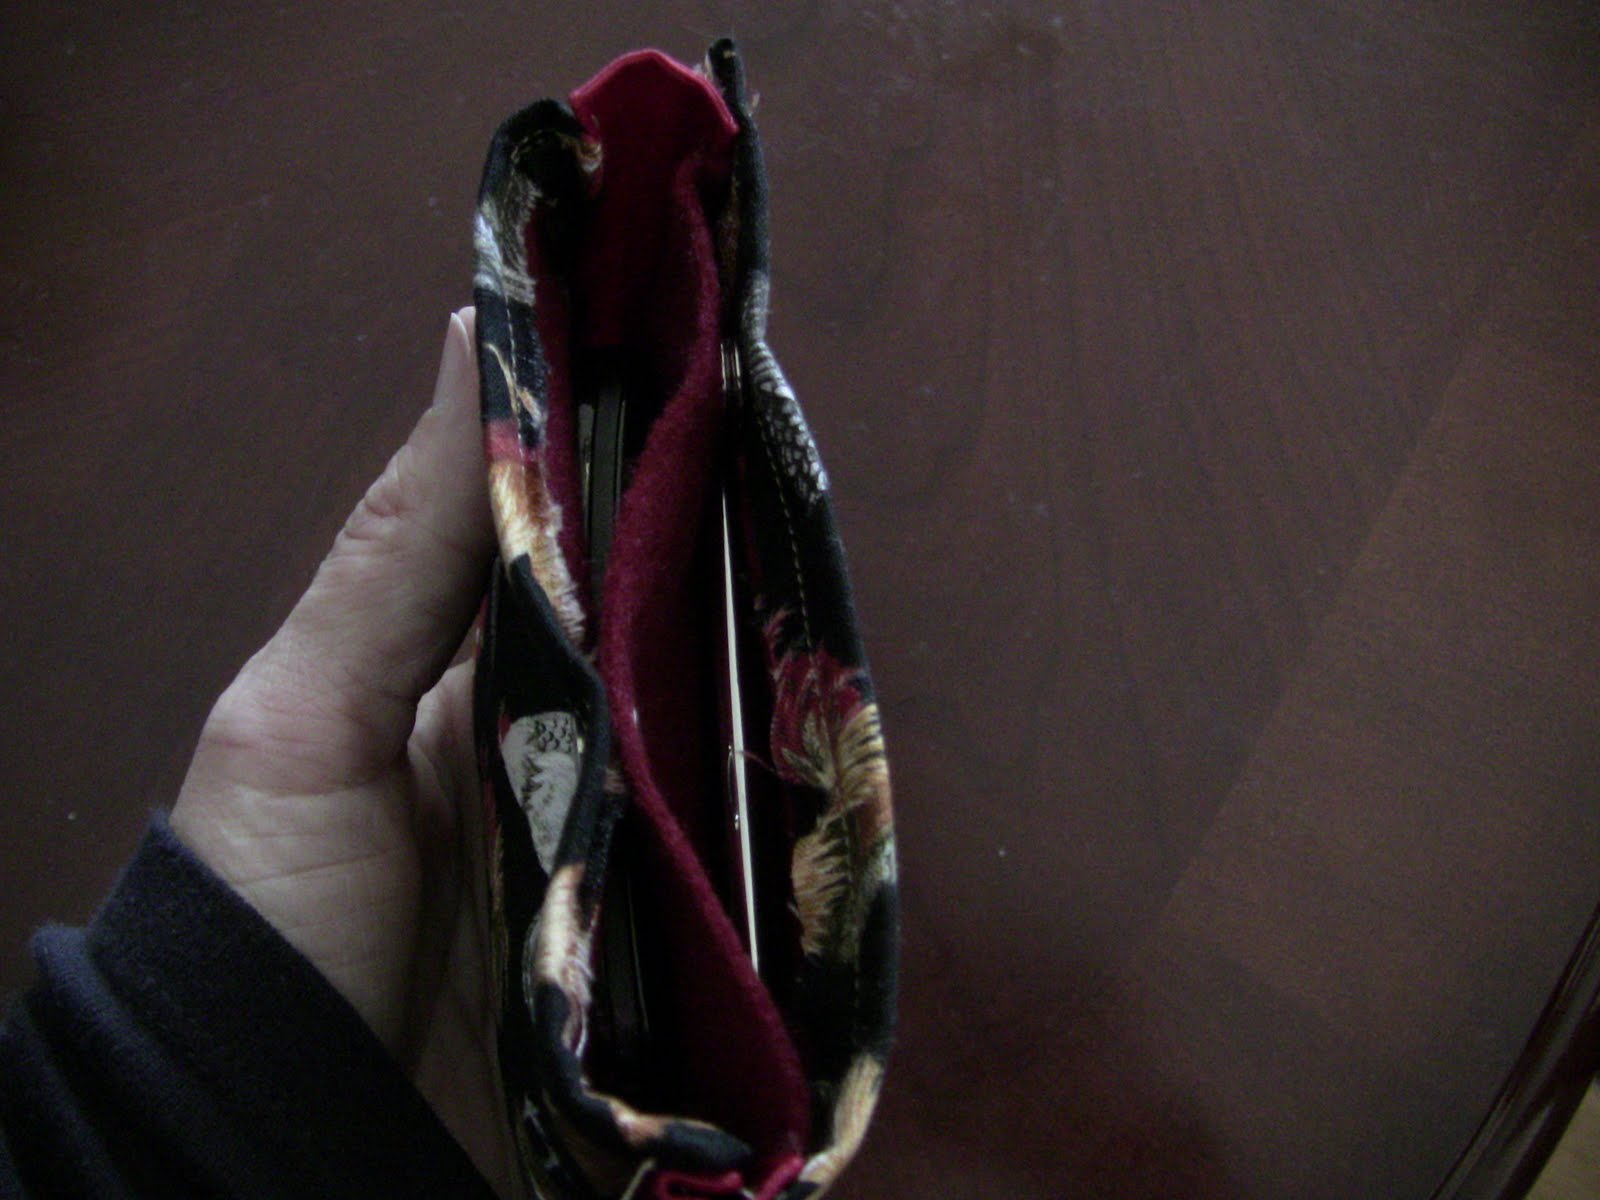
Then, with the case felt-side-out, I sewed the other side of the ribbon to the other half of the case, stopping near the bottom.  I did not sew across the bottom (unfolded) side of the ribbon.  Since nothing tiny, like a coin, will go inside this case, I am not worried about the small gap this will leave in the case.
I then turned the case right-side-out.  Notice in the above picture that the bottom of the ribbon tucks neatly inside the case. Notice also that the left and right sides of that ribbon are sewn differently.  I'm telling everyone that I did that on purpose because it looks cool that way. You may be thinking that if I had drawn out a plan, I could have figured out a way to make the right and left sides match, but if you are thinking that, you are too left-brained to do crafts with me.  [I did warn you.]
Because my purse is a disaster area, I needed something to keep the phone and ipod inside the case. It had to be something I can undo with one hand (not that I get these things out of my purse while I'm driving, but I may need them while I'm arm wrestling or something, you know).  I opted for snaps. 
Using a snap fastener kit, I attached snaps at alternate places.  The snap fastener kit was easy to find at JoAnn Fabrics and easy to use. The kit requires pounding a hammer on the little fasteners. But like Martha Stewart likes to say, you might not want to do that on your mahogany dining room table.

I've been using the ipod and phone case for a few days now and it is working really nicely. Success!

Tuesday, May 4, 2010

A Happy Birthday

It was R's birthday today.  His number one birthday wish? To have wine and cheese for dinner on the patio.  I also threw in some olive spread, sparkling water, truffle cheese, almonds, eggplant spread, and N's 'favorite cheese', which is technically figs and nuts shaped in a cheese-like wedge.

R's number two wish (a wish he didn't even realize he had, but in retrospect now understands he's been wishing for all his life)?  To have lemon cupcakes with crazy sparklers served on a Star Trek plate.